


 The "A.B." in ABCreations stands for Anmarie Bowden, that's me! My favorite ice cream is Mississippi Mud from Baskin Robbins, altho I'm partial to Oreos crumbled on top of Vanilla Bean ice cream too! I was born on Super Bowl Sunday. I have been digiscraping since 2000. I live in beautiful sunny California. I am married to my soul mate and we have two gorgeous children. My favorite saying is, “If you think my hands are full, you should see my heart!”
I use photoshop CS3 but this should work for most versions.
This is just a few steps beyond making a regular shadow...
I use this to give elements a more realistic look of dimension as if they are raised off the page.
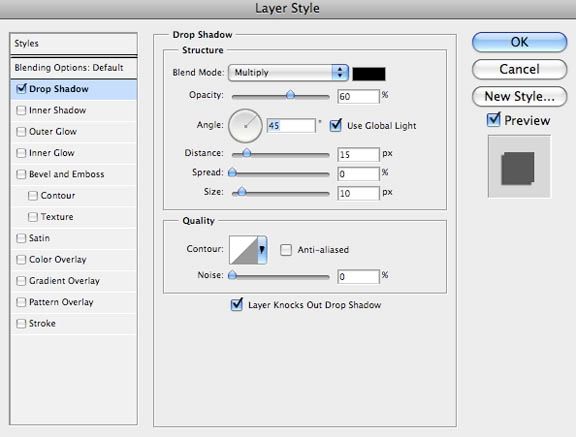
Also as a general rule. You want your shadows to be around 60 percent opacity or a bit lower for lighter papers.
I use these basic settings to start.
Starting with this...
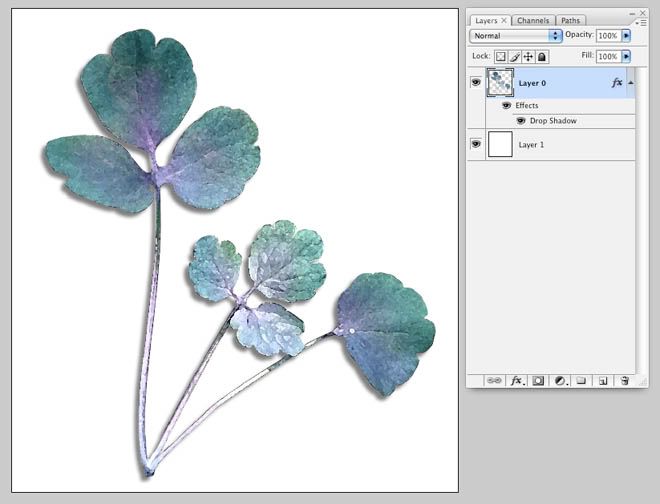
The reason you want to make a separate shadow layer
(where the shadow is all by itself not connected to the element anymore in the layers pallet)
is so you can modify it by using the warp tool.
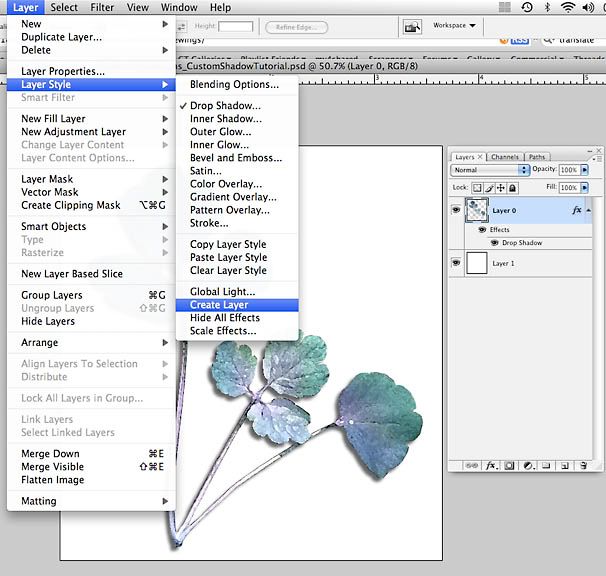
So now go up to Layers then under Layer Styles.
then select Create Layer
This will separate the shadow on it's own layer below the element layer.
Now you can see in your layers pallet to the right the two individual layers.


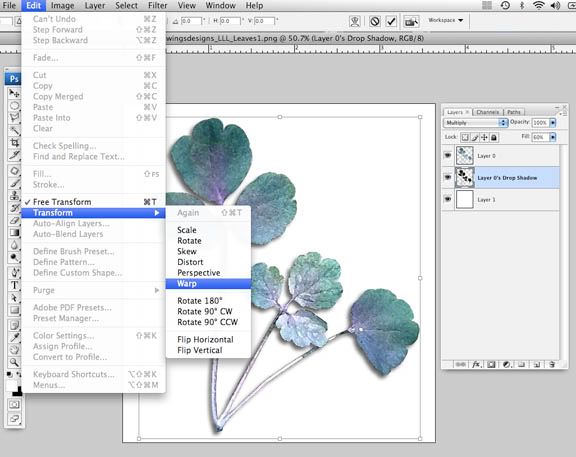
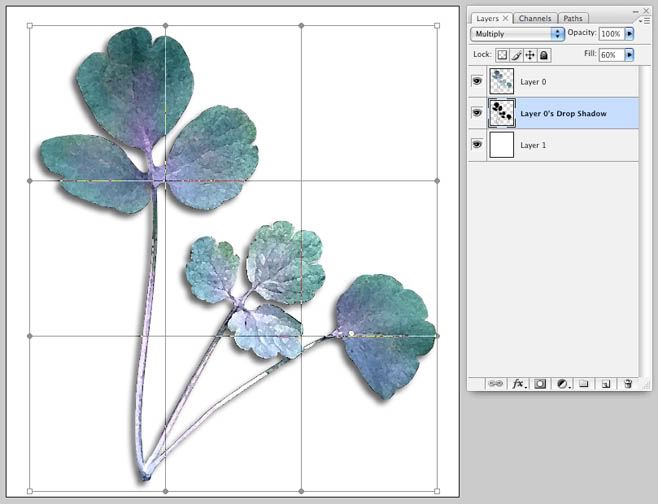
Now go to your layers pallet and select the Shadow layer
Now go under Edit and select Transform
Then select Warp
Now pull the tips by grabbing the section of the grid...
Make sure you move the closest sections around the corner of grid too so it looks natural. You want it to look naturally bent.
You will have to play a bit.
Also, make sure that you pull back the base so it is close to the object.
Here shows what the grid looks like...
After warping the grid...
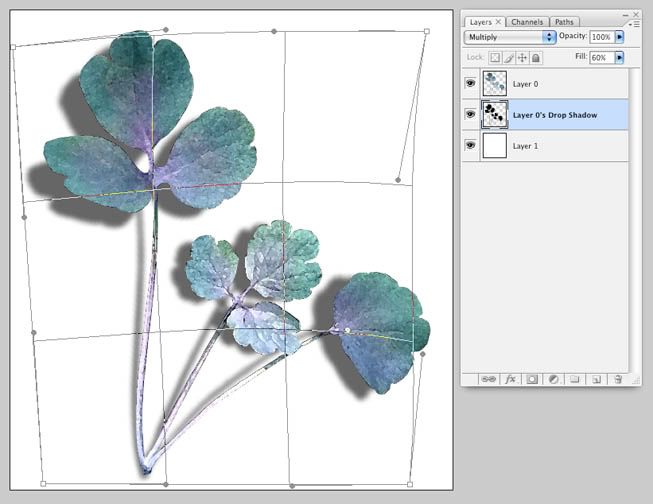
Here is the finished custom shadow.

Tip: if your shadow is too sharp go under Filter, Blur, and select Gaussian Blur and you can soften it
 You can do this in the first step making the size bigger. This is used after putting the shadow on it's own layer.
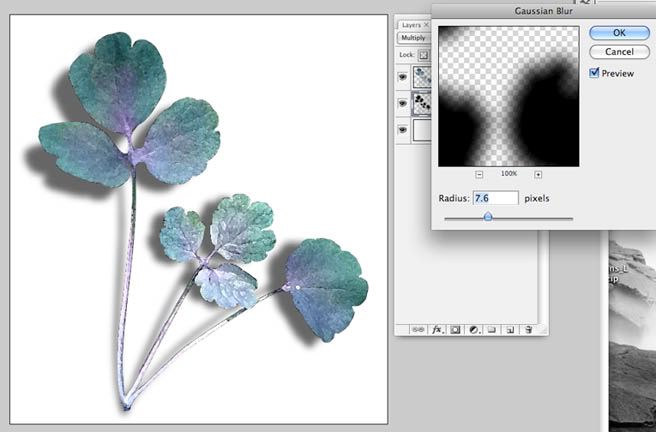
Softened Shadow
I also lowered the fill to from the orig. 60 to 50 since it is on white paper.
The fill is right below Opacity and acts the same as Opacity in this step.

I hope this was helpful. There are many different ways of doing things in PS

More Shadow Tips:
When I'm trying to figure which way to warp my shadows. I usually look at my
photo and see which way the light is casting down on the subject. I then try to imitate that when creating shadows on my page. Try to make all your shadows cast in the same direction away from the light. Think about depth and if you want something like a butterfly to look like it is flying off the page then make the shadow depth farther off the page and soften the size of the shadow.
I really love using custom shadows on my pages and think it really gives that pop to the elements. I use them on every page and even made an action for creating custom shadows. It makes a lot faster...
Oh another thing about shadows I was asked is do I color my shadows? ... I will usually use a very dark brown or black.
Another Tip:
If I have an area that I want to add more shadow too. I will make a layer above or below the item which ever area that I'm trying to add more depth.
I then put my settings to Multiply and select a soft brush. Then set the brush at a low opacity like 10. I then will paint in a shadow to add the depth I want. Building it up slowly so it looks natural.
Also a fun thing to try for lighter papers is setting your blend mode on your shadow to "Pin Light" this makes a softer shadow that I find can look more natural and especially for light elements and glass.
I hope you all have a wonderful day.


No comments:
Post a Comment