August's Question: Ok, I've got the digital glitter, but I need it to be seamless.
A. Offset with Paint Shop Pro
Go to Effects > Image Effects > Offset.
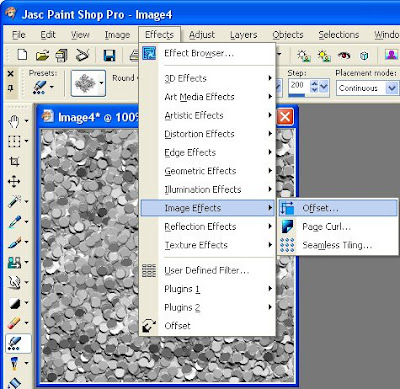
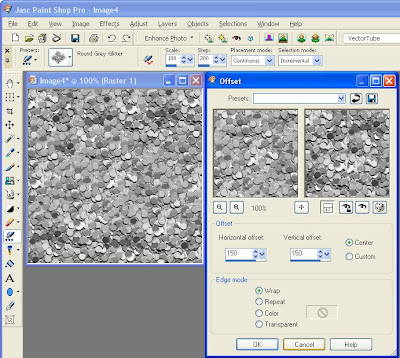
Horizontal offset = 300 (Or 50% the width of your image)
Vertical offset = 300 (Or 50% the height of your image)
Center = checked
Edge Mode = Wrap
NOTE: When you select center, the horizontal and vertical offset numbers will automatically change to be half of your image size.
B. Offset with Photoshop
Go to Filter > Other > Offset.
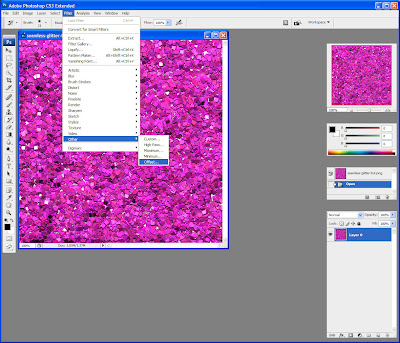
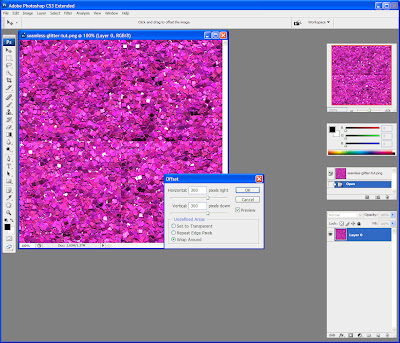 Horizontal = +300 (or 50% of your image width)
Vertical = +300 (or 50% of your image height)
Undefined Areas = Wrap Around
C. Simple Filters - Half Wrap
Simple Filters is a plugin for PSP (and perhaps Photoshop as well). The Half Wrap moves the image 50% down and 50% to the right.
D. Teph's Tricks - Wrap Filters
The Offset Wrap filter from Teph's Tricks is a plugin for PSP and Photoshop.
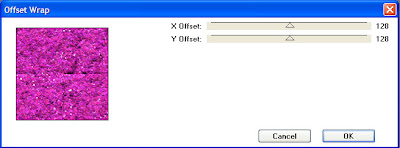 X Offset = 128
Y Offset = 128
Or you can use Slide X 50% filter followed by the Slide Y 50% filter. Both of these are also available from Teph's Tricks.
E. Offset with Gimp
Go to Layer > Transform > Offset. Click Offset by x/2, y/2. When you click Offset by x/2, y/2, Gimp will automatically fill in X and Y with the correct numbers.
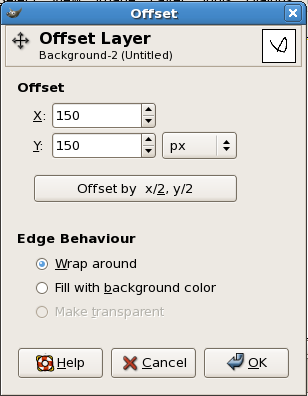 Edge Behaviour = Wrap Around
F. ImageMagick
The command line option for offsetting in ImageMagick is -roll {+-}x{+-}y
Though, if you are using ImageMagick, then you shouldn't be reading this tutorial because you already know far about image manipulation than this tutorial can provide.
5. Once the image has been offset so that the edges are now in the center, save it and import the image back into ArtRage (File > Import Image). Set Pressure to 14%. This will prevent the glitter from going off the edge of the canvas.

6. Put the glitter cursor at the top center of the image, directly over the seam, but without going over the edge of the canvas.
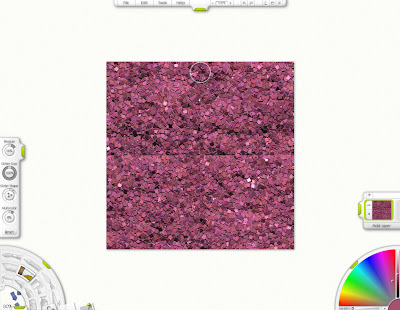
7. Glitter down the seam to the bottom of the canvas. Make sure not to go off the edge of the canvas. Repeat along the horizontal seam.
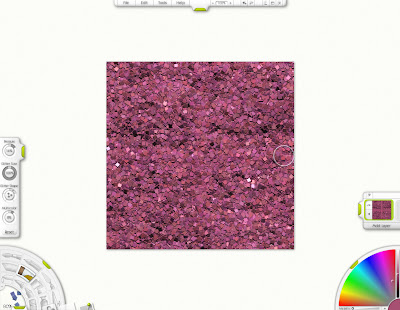
Now you have a seamless glitter tile.


 The "A.B." in ABCreations stands for Anmarie Bowden, that's me! My favorite ice cream is Mississippi Mud from Baskin Robbins, altho I'm partial to Oreos crumbled on top of Vanilla Bean ice cream too! I was born on Super Bowl Sunday. I have been digiscraping since 2000. I live in beautiful sunny California. I am married to my soul mate and we have two gorgeous children. My favorite saying is, “If you think my hands are full, you should see my heart!”


No comments:
Post a Comment